Requirements for and Constraints of Site based Teams Policies

If you need to implement Site Based policies in Teams, there are several pre-requisites and design decisions that you need to be aware of and consider in your design.

If you are in Canada, the United States, or India then this absolutely applies to you. If you are in any other location, it probably applies to you unless you are a very small Teams deployment in a single office.

Here’s a list of the site based policies in Teams:

  • Location Based Routing
  • Emergency Call Routing Policy
  • Emergency Calling Policy
  • Local Media Optimization
  • Roaming Policies

Location Based Routing

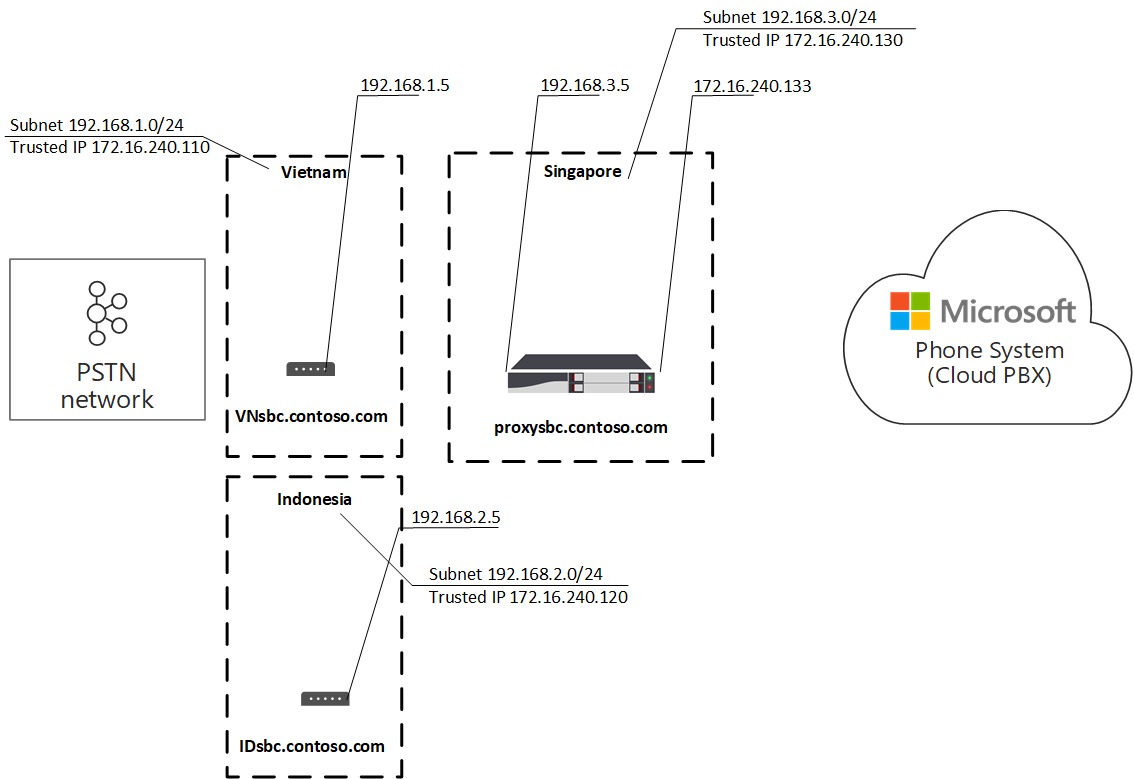
Location Based Routing is mostly used in India, though there are a few other scenarios where it may be useful. The general idea here is that you can’t mix IP based calls/meetings with more than one PSTN site.

Emergency Call Routing Policy

This policy controls where Teams will route emergency calls to when using dynamic emergency calling for Direct Routing and Operator Connect scenarios. You use dynamic emergency calling in Canada and the US by law, and it make sense to me to use it in other locations as well.

Emergency Calling Policy

This should really be called the Emergency Call Notification Policy. When an emergency call is placed from a site, this policy controls who is notified via IM, who is conferences in by phone, and whether the phone call is muted or unmuted (you should ALWAYS configure muted, you do not want to interfer with the emergency call taker getting the information they require).

Also tucked into this policy is “External location lookup mode”. I have yet to establish why this feature is in this policy. The External location lookup mode turns on the “work from home” location experience for mobiles and computers, to user the device’s native location services and/or user input to establish a location for emergency calls. If you have the network information for this policy to kick in for a site, you also have the network information to dynamically establish the caller’s location. Realistically, you need to turn on the External location lookup mode in an Emergency Calling Policy that is assigned to the user, so that it triggers when they’re outside of your organization. (Note: there is currently a bug where if you set the External location lookup mode on a global Emergency Calling Policy, it does not work. You need to assign the policy to each user individually).

Local Media Optimization

LMO allows a client device to send media directly to the inside interface of an SBC, avoid travelling up to Teams and back down. The previous couple of posts here cover LMO.

Roaming Policies

Here’s another policy name that doesn’t make sense to me. Roaming Policies apply bandwidth restrictions to users that are present in a site, replacing the same two parameters that are in the policy that is assigned to the user. In the SfB world, this was called Call Admission Control, and was handled in an entirely different fashion.

Requirements

The requirements for these site based policies to trigger are:

First, the client must egress to the Internet that is static, and dedicated to the organization. This is generally the IPv4 address that the client NATs to, but it could be an IPv6 address or an IPv4 address assigned to the device that isn’t NAT’d. These addresses are called Trusted IPs.

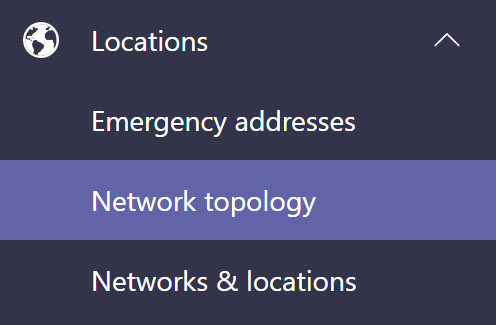
Second, you must define a Network Site under Locations > Network Topology and assign the subnets in use at this site to the Network Site.

Constraints

There are some technical constraints to these requirements.

For the Trusted IPs, static means that the IP address(es) do not change. A DHCP assigned address with a reservation is okay. If the address were to change, you would a way to be notified of this change, then you’ve have to update this information in Teams, then policies would have to replicate and be pulled by clients. That’s no good for emergency calling, and isn’t that great for other scenarios either.

Also for the Trusted IPs, dedicated to the organization means that you can’t use cloud proxy/firewall services such as those provided by zScaler, and the address could be shared between multiple organizations and the address(es) assigned to your clients may change.

For the Network Sites, the subnets must be assigned to only one site. You cannot have a subnet assigned to or spanning multiple sites. If you need your sites to be more granular that your subnets permit, you will need to resubnet. A typical place this happens is with centralized wifi controllers that lay one very large subnet over an entire organization.

There is also a large design constraint to be aware of. These five policies (above) are typically assigned to sites. You define the site, then assign the policies to the site. You do not get to define different sites for different policy types.

Let’s use an example to clarify that. A university campus has several buildings in a campus, and you’d like to set the same LMO policy and Emergency Call Routing policy to the entire campus. That makes sense, the whole campus is probably served by the same PSTN service, and likely needs to send all emergency calls to the same spot. Plus, the university has a wifi system that uses a large /20 subnet for the entire campus. You can define the entire campus as one site and meet these objectives (sorry for making this sound like a certification exam!)

However, in the US Kari’s law states that you must notify someone within the building with the details of any emergency call from that building. You need one Emergency Calling Policy for each building. This means that you must define each building as a site, and you must break the wifi subnet up into smaller subnets that only belong to one building. You don’t need multiple Emergency Call Routing policies though, you can assign the same “campus” policy to each site.

This type of scenario makes network engineers scream, and threatens to delay the project until they can sort the wifi. As an interim measure, I have seen some organizations configure each building as a site and assign the wired subnets to them. They then assign the giant wifi subnet to a “campus wifi” site, and configure an Emergency Calling Policy to notify staff who can relay the notification information to the appropriate parties. Don’t make a decision to do this on your own, you are not a lawyer (probably). Give this decision to your legal/risk/executives to deal with.

LMO with Proxie’d Sites. When do you need it?

In the previous two posts I’ve talked about Media Bypass and Local Media Optimization. In general, I don’t feel that the effort to configure those is dignified by quality gains that you may see… and you may not see, or you may make your call quality worse.

However, there is a more complex LMO scenario that involves two levels of SBCs in a hierarchy. The “spoke” or “remote” sites proxy to Teams through the main SBC. Microsoft provides this diagram on the docs page for this

As an aside, I very much dislike that 172.16.240.x is used as an example public IP or Trusted IP. RFC 5737 provides 3 example IP ranges. It’s technically impossible to have an RFC 1918 private/non-routable/internal only IP as your Trusted IP. This diagram is terribly confusing, especially when you start working with network and security teams, so ensure that you explain that they’re meant as example public IP addresses in this diagram.

Now then, on to LMO. We have two “remote” or “spoke” sites here, Indonesia and Vietnam. Vietnam has a PSTN connection and Indonesia does not. Neither Vietnam nor Indonesia SBCs are configured for Direct Routing directly to Teams. This could be because of poor Internet in those locations (either in terms of bandwidth or the ability to get enough static IPs that can be used as trusted IPs), or it could be a desire to limit the number of FQDNs and certificates required – though you could use a wildcard for all of the SBCs in the organization to achieve this too.

The SBCs in Vietnam and Indonesia proxy through the Singapore SBC. The Teams client, the Teams Direct Routing service, and the SBC sort out what path the media should take based on:

  • What site the user device/client is in
  • What site the SBC with the PSTN connection is in
  • What Proxy SBC is set for that SBC (or if it is the Proxy SBC)
  • What bypass mode the SBC is configured for (Always, or Only for local users)

The “remote”/”spoke” SBCs have an extra field that needs to be configured

which is the Proxy SBC.

The Verdict

Now, I’m not going to dive deeper into the technical bits of how this works and how you would configure it, because we’d honestly be here for months. If you are considering an LMO deployment that uses proxy SBC(s) and have not successfully done that before, then I implore you to reach out to a partner that has, and to involve your SBC vendor in that process as well. One does not simply turn on proxy scenario LMO and go home on time.

A Gotcha

I do need to include a gotcha here that will affect proxy scenario LMO design. For Teams to identify your client as being in a site, that client MUST egress to the Internet with a trusted IP address (recall that this is dedicated to your organization and static). If your reason for looking at proxy scenario LMO is because you can’t obtain a dedicated and static IP address in your remote/spoke site for Direct Routing, then you won’t be able to do LMO (or any other Site based Policy feature of Teams) at that site UNLESS you route traffic to Teams out via a site that does have a dedicated/static IP address.


Local Media Optimization – Do you need it?

In my previous two posts, I give an intro to Media Bypass and Local Media Optimization, with the end goal of determining if you need them or not.

Local Media Optimization (LMO) at its core is similar to Media Bypass, except your device connects directly to the inside interface of the SBC and not the outside interface. That’s good in some ways, but does add some complexities of its own.

First, we don’t need to worry about firewall hairpinning or having to battle the security guys to open up the outside interface. We only ever talk to the inside interface, and thus only internal clients can do LMO. However, it’s only the outside interface that has an FQDN, so we need some other way of establishing where the SBC is, and how we connect to it. And that’s a bit of work.

In Teams Admin Center (TAC), under tLocation > Network Topology

you specify two important components for this, The first is Trusted IP Addresses, which are the IP addresses your clients are NAT’d to when they access Teams (or your entire IPv6 range if you’re one of the cool kids doing that). This lets the client understand if it’s “internal” on your network or external. That leads to a couple of requirements – you need to have static IP address(es) assigned only to you. No cloud-based shared proxy services like zScaler offers, and no dynamic addresses (DHCP assigned addresses with a reservation are fine). If your client doesn’t egress to the Internet with an IP that meets these requirements, it will not be identified as internal to your network and will not be able to do LMO.

The second part in TAC that you need to be concerned with is under Locations, Network Topology, Network Sites. This is the section where you identify sites in your network and what subnets are present at each site. This is used for the client to identify where it is within your organization, and thus which location based policies (of which LMO is one) apply and where.

There’s a third part that you need to do as well, and that’s in the configuration for the SBC. In TAC under Voice > Direct Routing click on the SBC, the select Settings, the Edit

For LMO you need to configure a couple of things. First, Gateway Site ID is the site that you configured above, that the SBC belongs to. SBCs are made by many vendors, and don’t have enough Teams client bits baked into them to establish what site they’re in based on IP address, so you have to specify it here.

The next part you need to configure is Bypass Mode – even though this is LMO and not Media Bypass. There are two options here, Always, and Only for local users. Always will attempt to do LMO for all clients, and fall back to default media paths if that fails. Only for local users will only attempt to do LMO if the user’s device is in the same site (that you defined above) as the SBC.

And lastly, you need to turn on “Media Bypass” even though we’re doing LMO. If you’ve read my previous post on Media Bypass and don’t want to do it, that’s fine. You won’t magically be doing it by turning this on unless you also configure your firewall.

Your SBC vendor will also have a bunch of configuration steps to take on the SBC to enable LMO.

Your device and the SBC should now be doing LMO.

SBC isn’t in your site

To be clear, here “site” means “your organizations premises” and not the Network Site that can be configured in TAC (that is the Bypass Mode of “always” or “only for local users”.

Moreso than with Media Bypass, LMO makes little sense to configure in hosted scenarios. First, you’d need to establish a network connection from your LAN(s) to the inside interface of the SBC, so now you’re firing up VPNs and dealing with datacentre or Azure networking, and… that makes no sense to go through that effort to get the traffic to the SBC.

LMO is also not applicable to Direct Routing as a Service scenarios. No DRaaS vendor in their right mind would setup an inside interface and take on the burden of LMO configuration on their SBCs, even if you paid them lots of money.

The Verdict

But wait you say, I’ve only cover basic LMO configuration. Yes, just one SBC, and users on the inside. We’ll dive into the more advanced “proxy” or hierarchical LMO deployment in the next post.

My recommendations are two-fold here. First, if you have excellent WAN bandwidth for users from any site to be able to place calls via the SBC you’re configuring LMO for, go ahead if you want to try it out. It’s probably going to be rare that you have run into a scenario where you have so many users in France who are trying to call Australian PSTN numbers via the SBC in Australia that you will need to be concerned about bandwidth consumption in “Always Bypass” mode. If this is the case, then flip the mode for this SBC to “Only for local users”.

Second, my recommendation for Media Bypass also applies here. If you’re not seeing call quality issues, then it may not make sense to go through the hassle of configuring LMO within Teams (well, it’s not that big of a deal) and in the SBC (this is more of a big deal, it can be messy and confusing). If you think you may benefit from LMO, and you have enough data in CQD for a baseline to compare against, go ahead and turn on LMO.

TL;DR – you probably don’t need to do Media Bypass or this basic form of LMO unless you have some weird network capacity constraints and topologies.

Up next, we’ll touch on the Proxy configuration for LMO

Trunks, gateways and ports (oh my!)

I was commiserating with a co-worker recently about how challenging SIP trunks can be when they’re new to you. Specifically we were talking about what port and protocol a device listens on, and what port and protocol the peer device will listen on. Somehow, I agreed that I’d write a blog post about this topic, so here it is!

Here’s a snippet from the SfB topology builder for a gatewaysfb tb gateway


Our Gateway has an FQDN, which must resolve to the IP of the peer device. You could also use the IP address here. In larger environments, a meaningful FQDN can be helpful vs trying to memorize or find your (probably outdated) list of IP addresses and gateways.

At the bottom, we see a list of trunks that are configured for this gateway in SfB. You can have more than one, but that’s a more advanced configuration and we’re shooting for basic understanding. Similarly, you can ignore the IPv4 addresses and Alternate Media entries.

Here is the associated the topology builder entry for the trunk:

sfb tb trunks

We’ve got a name for the trunk, which also happens to be the FQDN of the gateway. This is the default that SfB creates, you can change it during (but not after) the creation process.

The PSTN Gateway line has the FQDN and SfB Site (in brackets, HQ here) of the gateway/peer device.

The Listening port and SIP Transport Protocol indicate what protocol and port the gateway device is listening on. We’ll see that in the gateway configuration in a minute.

Mediation Server indicates the FQDN of the mediation server (or mediation pool, if you’ve got a pool of them).

As promised, here’s the configuration on the other end of the trunk, in this case from an AudioCodes SBC, showing what port it’s listening on:

audc sip interface

Here you can see that the device is listening on TCP port 5060. Note that it also appears to be listening on port 0 for UDP and TLS. That’s just AudioCodes configuration for “not listening”

notlisteningemoji

And here’s the entry from the Proxy Set on the AudioCodes SBC showing the SfB mediation pool, and what port and protocol it’s listening on.  Proxy Sets on the AudioCodes devices are the equivalent of the Gateway in SfB topology.


audc proxy set


Here you can see that the AudioCodes expects the peer device at 10.12.1.101 to be listening on TCP port 5068.

Okay, so why do I have an IP address here, but an FQDN in SfB? Well, you can use either, as we discussed above. However, one thing that we do stumble across (too) often, is someone poking the DNS records for the SfB mediation pool. They don’t understand that “FEPool1.example.com” *should* in fact have one entry per front-end server, so they decide to do some “cleanup”.

There are some common (incorrect) assumptions that we often see. The first is that the port and protocol need to be the same on the devices at both ends of a trunk. This isn’t true. They need to be the same protocol, but it’s perfectly normal for two devices to be listening on different ports.
The other issue we see is the assumption that a specific port/protocol has to be used. You’re restricted to using the protocol(s) that your device supports. That’s always TCP for SfB, and UDP and TCP for most SBCs and gateways. You can use any available port that you wish, though there are some conventions to use 5060 for SIP, and 5061 for SfB’s encrypted SIP, 5068 shows up by default for the Mediation pool to listen on, you can change that if you want too, just don’t get too creative. Somewhere down the road, someone will need to support what you’re creating, and a port of 8765 for SIP traffic is going to seem odd.

AudioCodes Configuration for SfB

I’ve worked with a couple of organizations in the past several months that have had… inconsistent configuration on their AudioCodes gateways and SBCs for proper connectivity to multiple (or in some cases single) SfB pools. For simplicity, I’ll use the term “SBC” to mean both the SBC and Gateway, unless there’s a particular need to call out one versus the other.

In an AudioCodes SBC, you can route traffic to/from your SfB system using a variety of uncivilized methods, including specifying IP addresses. Yuck. Do yourself – and those who’ll look at your config after you’re done – a favor and use Proxy Sets. You’ll find those under “Signaling & Media”, then “Core Entities”, then “Proxy Sets”.

A Proxy Set lets you specify a number of characteristics for a system that you want your SBC to communicate with, allowing for much less clumsy and random configuration. Here’s a Proxy Set configured for one simple SfB server:

ProxySetSE

This could be a standalone mediation server, a Standard Edition server, or a solo Enterprise Edition Server. Let’s have a more detailed look at the configuration.

General

ProxySetGeneral

The General section is pretty straight forward. You need to give your Proxy Set a name. There aren’t any particular requirements here, so use something that make sense to you. The first part of your SfB pool name is a good choice “LAXSfBPool”, for example. The name of your telco provider is a good choice for connections to the PSTN. For the rest of this post, I’ll assume you’re connecting to an SfB Standard Edition server.

Next you need to specify the SIP interface that your SfB server will connect on.  A SIP interface is a network interface plus a few other characteristics, like what port and protocol the SBC will listen on. The TLS context is the group of TLS settings that you’ll use to talk to your SfB server.

Keep Alive

ProxySetKeepAlive

SfB uses SIP OPTIONS (yeah, it’s capitalized, I’m not yelling) for two purposes. One is to advertise capabilities (“options”) and the other is as a heart-beat or keep alive mechanism. For connecting an SBC to SfB, you’ll want to set the Proxy Keep-Alive to Using Options. There’s a timer for how often you want these sent – the default is every 60 seconds, and you can leave that in place.  The remainder of the variables here are for tuning the specific behavior of your connection if OPTIONS aren’t received, and what criteria need to be met for the connection to be “up” again. Generally, you can leave these alone – I’ve never had to tweak them in a couple decades of doing this stuff.

Advanced

ProxySetAdvanced

The advanced section has only two settings. Classification Input determines whether the SBC will listen to anything from the specified IP addresses (we’ll see that part later) or if the port and transport type – TCP,UDP.TLS  must match too. Go ahead and change this to include Port & Transport Type if you’re super security aware, otherwise leave it at IP address. For DNS resolve method, you can leave this blank to use the global parameter “Proxy DNS Query Type”. You can do some funky things here, but I’ll talk about FQDNs and IPs later when we specify those.

Redundancy

ProxySetRedundancy

This section is where I see the most misconfiguration. For a Standard Edition server, however, you don’t need any settings here, so leave them at their defaults (having them set won’t affect anything, but sure is confusing to look at when troubleshooting).

Proxy Address

ProxySetProxyAddress

This is the spot where you add the FQDN or IP address, port, and transport type for you SfB servers. You can use server FQDNs if you like, especially for more advanced configurations that use the various DNS Resolve Methods in the Advanced section… However, for SfB, most everyone that I know uses the IP addresses of the servers – they’re unlikely to ever change, and using IPs means you’re not dependent on DNS infrastructure. This also guards against changes or deletions of DNS records, though you have other problems if that happens! I always specify the port and transport type, to prevent any gotchas should the system defaults ever be changed.

Next post, we’ll have a  look at the changes that need to be made when you have an Enterprise Edition pool with multiple front-ends, as well as multiple pools. Just for fun, there are some differences in configuration here if you have a gateway or an SBC.