When I’m working with clients to migrate from their existing phone system to Teams, that phone system can sometimes be pretty old. And with old phone systems come old phone system habits. Those habits don’t translate well into Teams. One of the biggest items is how to set up the reception phone – or now, the reception user.
Old School
In older systems, reception is a phone on a desk, and that phone owns the main phone number. The receptionist doesn’t get their own phone or their own number. The phone rings, they pick up the handset, mash a few buttons for a transfer, and done. That phone might have some extra buttons for line appearances for frequently called users. It might also have a headset attached to the phone. In some cases, the headset plugs into an external box, so the main receptionist can unplug their headset and wander the office, or ensure that nobody else uses their headset (for hygiene and fit/adjustment reasons).
Trying to bring that scenario into Teams is like putting a round peg into a square hole. Or maybe a round peg into no hole at all – you need a really big hammer to try and make it work, and you’re left with a mess.
Teams is Different
Everything in M365 is integrated – M365 account, email access & address, Teams channels and phone number assigned. A receptionist could not use the reception phone number as their own phone number without the implementation being messy – anyone needing to cover the reception desk needs to be able to access the receptionists accounts. Email is no longer an infrequently used, separate application. The person in the reception role likely needs their own network, email, and Teams account for Intranet, chat, and HR/payroll purposes. Messy.
Let’s also layer on modern security. The reception account should be MFA enabled. As a key account in the organization, logging and monitoring for odd behavior should be in place. All of this become challenging (and messy).
If the organization is larger and has multiple people answering the reception number, things really start spiraling out of control and get very messy.
The Solution
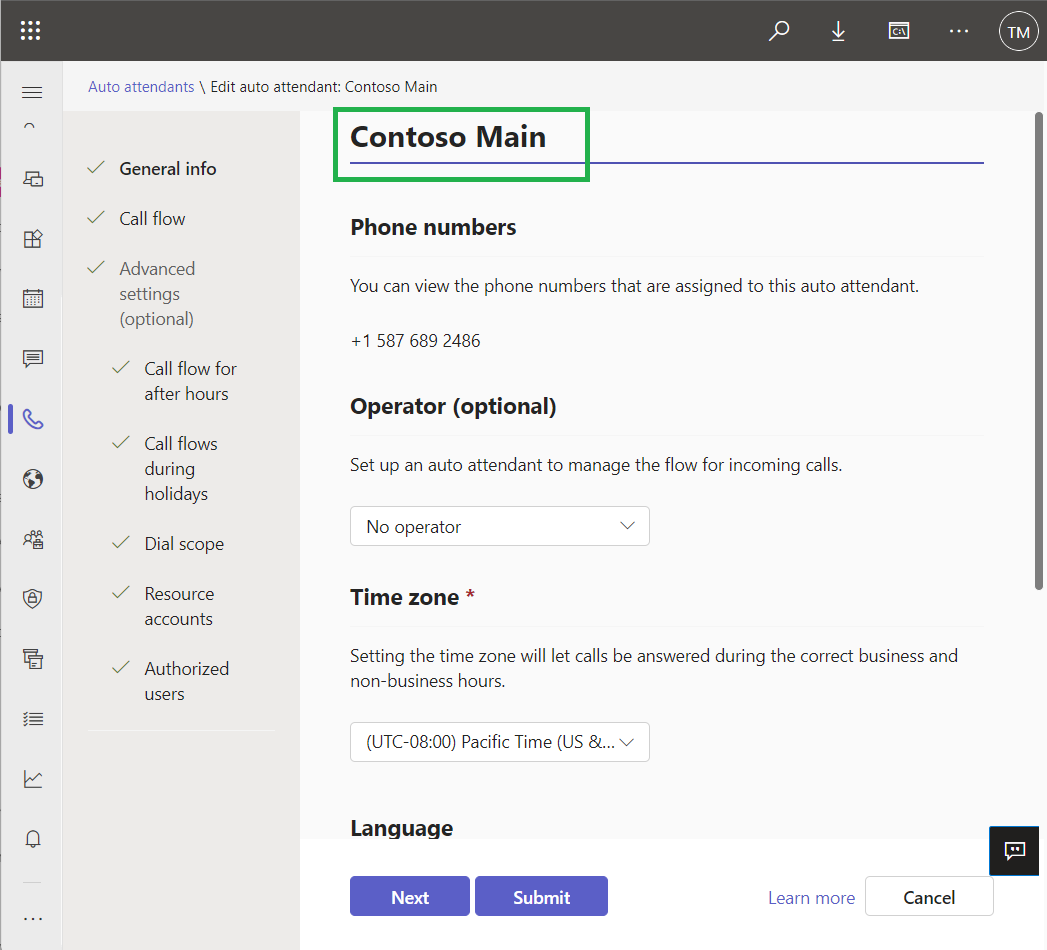
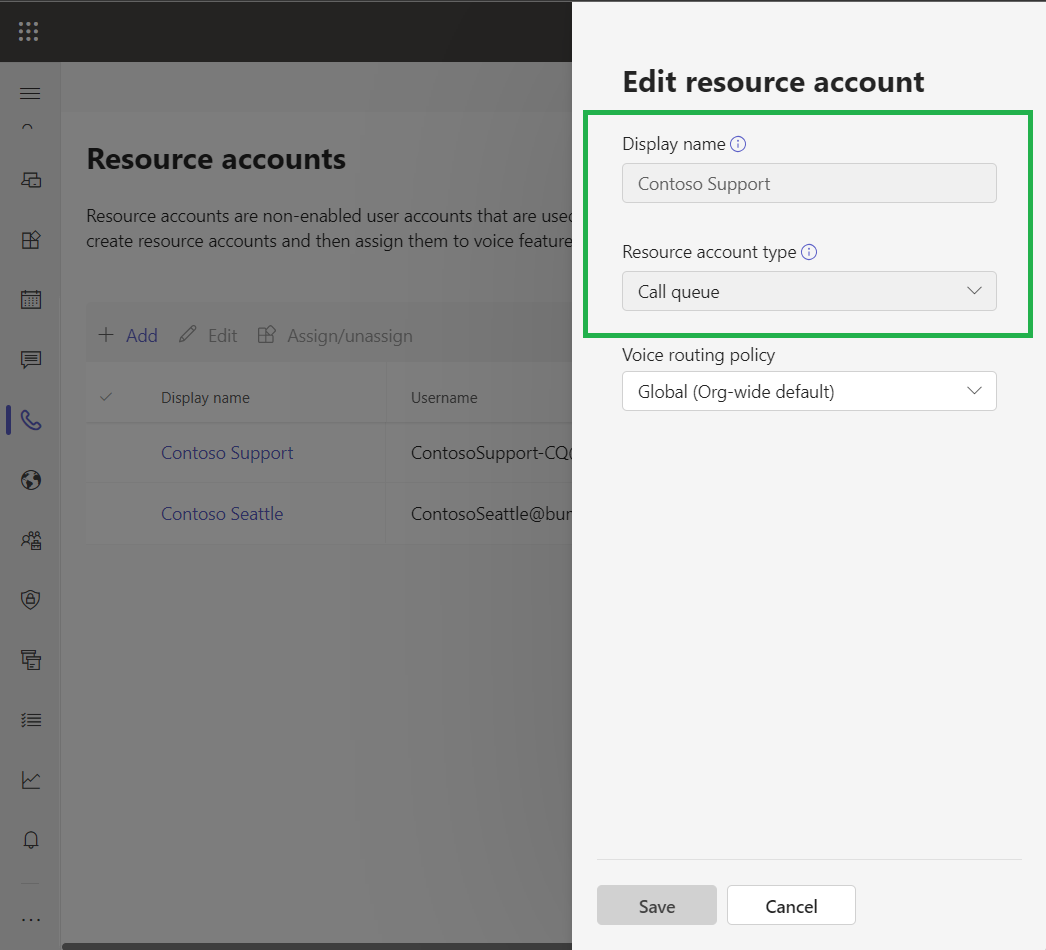
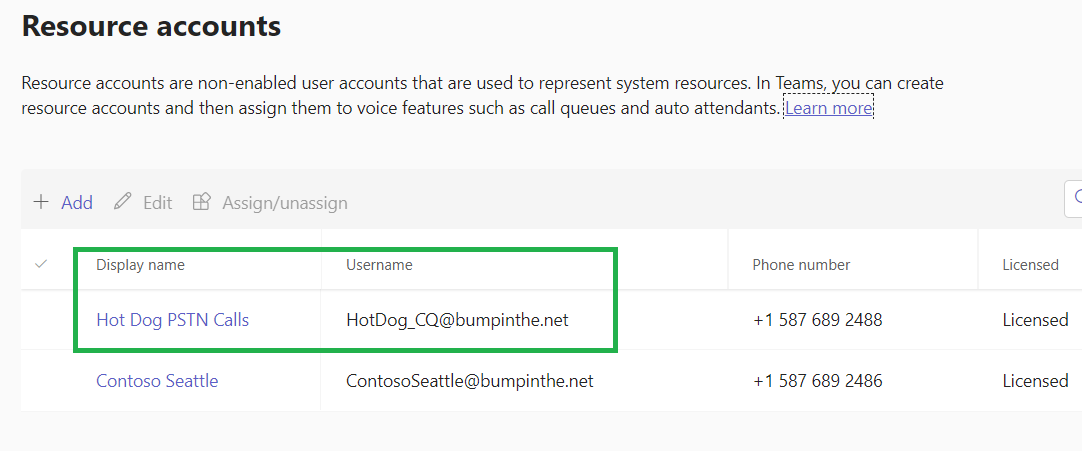
The people who work at reception get their own full user accounts. The reception function or role is best implemented as a Call Queue, with the reception staff added as agents to the call queue. Each reception user now has their own full M365 account, with appropriate security measures like MFA.
Call queues allow agents to place outbound calls as the call queue (vs their own account and phone number), further keeping “receptionist staff” and “the reception function” apart.
Reception voicemails go to an M365 group mailbox (vs the receptionist’s mailbox), where multiple people can be granted access.
What Devices to Use
For a small office with one receptionist, they get the Teams client and a nice headset. A mid-range phone with a shared device license should also be configured as an agent in the call queue. This allows the phone to be answered if the PC is rebooting, locked, the headset battery is dead, etc.. It also allows someone else to cover the reception desk/phone during the receptionists breaks without needing to logout and login as a different user on the PC. The shared device account needs to be configured with a Caller ID policy so that calls are placed with the call queue number.
In a busier or larger office, that phone can be a higher-end model that can accept one or more sidecars to facilitate transfers and viewing presence of frequently-contacted users.
Multiple users could also be added to the reception queue. The organization can take advantage of the call distribution methods like “serial” to have one user be the primary call taker, and other be their backup. I’ve seen accounting staff often added here for this purpose.
If that “phone on the desk” does not have a side car, then a shared device license would be suitable. If the phone has a sidecar, the users on that sidecar are usually administered through the Teams desktop client. You can logon to the Teams client to do this. An in-private web session lets a user do this without logging out of their own Teams app.